-
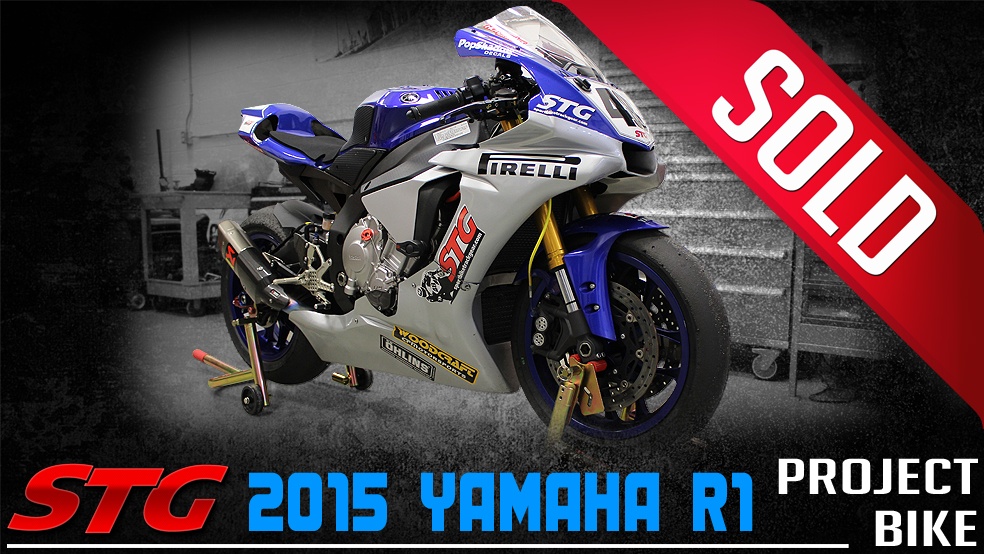
The STG R1 Project Bike has been sold and it's time to move on to the next project. We have done so many projects on this bike over the last three years it became part of the team here at STG. Watching it ride off is a little like getting your heart broken. Only way to get over that is by diving deep into the next project. Stay tuned for more details on what's next here at STG.
The 2015 Yamaha R1 is the longest running project bike we have done so far. The reason for this is simple, Van loved riding the R1 too much to part company with it! Over the last three years we have done countless install videos while wrenching on the R1, more than any bike previously for sure. This STG Project Bike Build Page has proven itself to be a valuable resource for any 15 and up Yamaha R1 owner.
-

2015 Yamaha YZF-R1 First Track Ride at Grattan Raceway
-
-
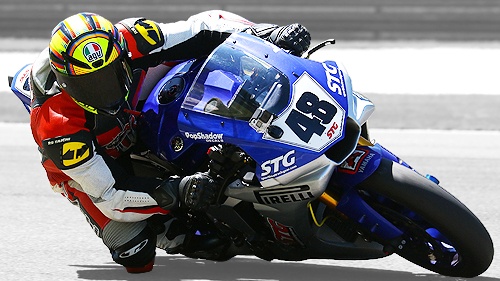
I was finally able to make it to Grattan Raceway with our friends at Sportbike Track Time. We only completed a couple small modifications before taking it to the track, I wanted to see how the motorcycle would perform mostly "as is" from the factory. This is one of the first times in years that I've ridden on street tires as well. I wanted to take it easy being the first time at the track for the year, as well as being my first time on the bike. So, we didn't take any cameras and I didn't put a lap timer on the R1, but just rode around and got a feel for the motorcycle.
Overall, this is the best motorcycle I've ever ridden and they did a phenomenal job with this machine. If you are considering picking up the new Yamaha YZF-R1, just do it.
Van Sends The STG R1 Project Bike Off In Style...
-
The 2015 Yamaha R1 Project Bike was a ton of fun and this bike will be missed for sure. I spent 3 seasons with this bad boy riding and wrenching on it more than any other bike we have done previously. As you would expect I made sure the R1 is headed to a good home where she will be loved and taken care of properly.
Just so she felt safe and secure in her new home I included the same set of Pit Bull Stands she rested on here at STG! God Bless and Farewell to you my trusted R1. - Brian Van
-
2015-2018 Yamaha R1 Akrapovic Exhaust System Install
-
-
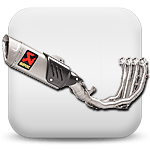
This exhaust system has spent more time of the STG R1 than any of the others during the 3 years we built the bike. The Akrapovic Yamaha YZF-R1/M 15-17 GP Titanium Slip On Exhaust can be installed on the stock CAT for street riders or paired with the matching Akrapovic Yamaha YZF-R1 15-17 Titanium Optional Link Pipe/Collector to form a 3/4 system like we did for our R1. Akrapovic offers amazing quality with a fit that leads the industry for sure.
This Akrapovic System has been our best selling for the 15-18 Yamaha R1 since it was introduced.
2015-2018 Graves Cat Eliminator Exhaust System Install
-
The stock exhaust system needs to go for many reasons and Graves is a great choice. Van installed a Graves 2015-2018 Yamaha YZF-R1 Cat Eliminator Exhaust System on the STG Project Bike. This system reuses the stock header and replaces the cat/muffler box as well as the canister. The performance is very close to that of the full system, it shaves about 14 lbs and the cost is about half of the full system which makes for a well rounded package. The install is pretty straight forward for the most part with the most difficult part being the Lambda sensor on the throttle side as I had to partially remove the fuel tank to deal with it.
Graves and Yamaha are like Corona and limes, they belong together and do not disappoint. Graves has been racing Yamaha's at the highest level here in the US for a long time with a ton of success. All that goes right into their parts so it's hard to go wrong IMO.
-
2015-2018 Yamaha R1 Graves Moto 1 Slip On Install
-
-
The stock exhaust system is not even close to being sexy enough for this bike. Van installed a Graves 2015 Yamaha YZF-R1 Moto1 Slip-On Exhaust System on the STG Project Bike. The install is a breeze, taking 5-10 minutes and requires the use of two allen wrenches. Personally I really like the look of this canister design, it looks amazing on this bike. This system keeps the stock catalyst, muffler box and EXUP valve on the bike so there is no need to install a fuel controller or a tune which is nice as it saves money. Weight of the stock can is 3.4 lbs. and the Graves Slip-On is only 1.6 lbs. shaving nearly 2 lbs. The difference in sound as compared to the stock canister really surprised me, it sounds every bit as good as it looks!
I would recommend this for a rider looking to enhance the look and sound of the R1 that does not want to invest in a system that eliminates the emission control systems and requires additional expense for tuning, block off plate installation and an exhaust servo eliminator to turn off the engine light once the EXUP is removed.
2015-2018 Hotbodies Racing MGP Exhaust Install
-
The stock exhaust system needs to go for many reasons and Graves is a great choice. A highly engineered bike like the Yamaha R1 it is often difficult to find basic upgrades for those looking to do little more than increase the curb appeal and sound of their motorcycle. For those folks Hotbodies has designed Hotbodies Racing Yamaha YZF-R1 15-17 MGP Exhaust which is an affordable and simple exhaust for the R1. This MGP will work wonders to increase the decible level of your motorcycle while also providing the carbon race look that many riders look for when purchasing exhaust. In addition to the increased sound and apperance the slip-on is also very cost effective giving riders an even greater scope of options for this awesome new motorcycle.
-
2015-2018 Yamaha R1 M4 GP Mount Slip On Exhaust w/ Catalytic Converter Eliminator Install
-
-
The M4 Yamaha R1 2015-2018 GP Mount Slip On Exhaust w/ Catalytic Converter Eliminator drops 12lbs as compared to the stock canister and catalyst. As we have come to expect with M4, the exhaust note is nothing short of wicked! The GP2 Exhaust Canister looks great mounted to the matching cat eliminator. This set up will improve performance and unleash the wicked note hidden inside that cross plane 1000cc engine! Watch as Van goes into further detail in this install of the GP Mount Slip On Exhaust from M4.
2015-2018 Yamaha R1 Yoshimura Race Alpha Series 3/4 Exhaust System Install
-
The 2015-2018 Yamaha R1 Yoshimura Race Alpha Series 3/4 Exhaust System is the most beautiful well fit exhaust system that we have seen in some time. This Stainless steel track only system is a great looking and performing alternative to the stock exhaust on the 2015 Yamaha R1. Although significantly quieter than the other 3/4 systems that we have tried the Yoshimura fitment and appearance make it highly effective in every aspect of a performance exhaust. Watch the video to see the ease of installation of this exhaust and to hear the power and sound of this great aftermarket exhaust. Head over to Sportbiketrackgear.com to pick up one of these great 3/4 systems for your motorcycle today!
-
2015-2018 Yamaha R1 Arrow Competition Full Exhaust Install
-
-
Van installs the Arrow Competition Full Exhaust System on the STG 2015 Yamaha YZF-R1. This system is available with Titanium or Stainless pipes and we went with the 230mm canister which is the one we all saw in the Arrow dyno video. The system fits very well and really offers that kit race part look and feel. This system is designed for closed course use and produces an amazing note. In this video you will see Van install a large spacer between the exhaust bracket and canister strap. This was included in the hardware kit which came with no instructions. After filming the video he decided to remove this spacer and it improved the ground clearance as well as created more room by the right rear set.
2015-2018 Yamaha R1 Exhaust Sound Comparison
-
We give you a comparison of how some of the different Yamaha YZF-R1 Exhausts sound. We compare the Akrapovic Slip On, the Yoshimura Alpha 3 Quarter Exhaust, the M4 Street Slayer Slip On, the M4 GP Mount Slip On, the Graves Moto-1 Slip On, and the Arrow Competition Full Exhaust. Let us know which one you think sounds the best.
-
2015-2018 Yamaha R1 M4 Street Slayer Exhaust Install
-
-
The M4 Yamaha R1 2015-2018 Street Slayer Exhaust drops 14.5lbs as compared to the stock canister and catalyst. The Street Slayer mounts high and tight under the rearset with a look you won't find with any other system. As we have come to expect with M4 the exhaust note is nothing short of wicked! The MC36 canister has a full carbon sleeve and the Signature M4 Carbon End Cap.
2015-2018 Yamaha R1 M4 Titanium CAT Eliminator Install
-
The 2015-2018 Yamaha R1 M4 Titanium CAT Eliminator removes 13 lbs as compared to the stock set up. It will work with stock muffler, or any aftermarket muffler that mounts in Standard/Stock position and has the same inner diameter as the stock canister.
-
How to change a 2015-2018 Yamaha YZF-R1 from Standard to GP Shift
-
-
Racers love any advantage they can get in situations where controlling the basic operations of the motorcycle can be difficult. Situations like upshifting during a turn can be uncomfortable and in a race scenario missing a gear can be detrimental to the outcome of the competition. For this reason many individuals opt to convert the standard OEM shift pattern (1 down and 5 up) to the inverse (1 up and 5 down) in order to alleviate many mistakes that are made during shifting. As Van explains in this video the process of making these adjustments is not difficult but will require some some tools and parts that are available at Sportbiketrackgear.com. Watch as Van switches the 2015 Yamaha R1 project bike from standard to GP shift to make this bike an even more effective race ready machine!
2015-2018 Yamaha R1 Woodcraft Rearsets Install
-
The 2015-2018 Yamaha R1 Woodcraft Rearsets allow for either standard or GP shift patterns in addition to adjustable foot pegs and toe pieces. If you have an R1 or R1M the Woodcraft Rearsets work perfectly with the OEM quick shift sensor.
Proper adjustment is key when road racing or even being comfortable when riding on the street which means often time the non-adjustable OEM rearsets can cause discomfort and a loss of usability can occur. Additionally OEM applications are often difficult to replace and find parts for making crashing much more of a pain than it needs to be. This is why companies like Woodcraft manufacture products that are adjustable, replaceable and generally better quality for performance riders than those that often come stock on a motorcycle. In this video you can see as Van replaces the OEM rearsets with a more effective aftermarket rearset from the manufacturer Woodcraft. Woodcraft rearsets are designed for racers by racers which makes them ideal for situations where comfort and dependability are crucial. Watch as Van takes you through the steps of swapping out these rearsets and see the differences the new upgraded items make in stance of the rider on this motorcycle and also view the ease of replacement with many of the parts built into these rearsets.
-
2015-2018 Yamaha R1 Driven TT Rearsets Install
-
-
The 2015-2018 Yamaha R1 Driven TT Rearsets allow for either standard or GP shift patterns in addition to adjustable foot pegs (4 positions) and folding toe pieces. This kit includes an exhaust bracket in the kit so you do not have to reuse the stock exhaust brackt like with some of the other kits. If you have an R1 or R1M the Driven Rearsets work perfectly with the OEM quick shift sensor.
I rode with this kit installed several times and really liked the postion of the pegs and the feel they offer.
2015-2018 Yamaha R1 Attack Performance Rearsets Install
-
Adjustability, Moto-GP Level Engineering and Top Shelf Quality from Attack. The 2015-2018 Yamaha R1 Attack Performance Rearsets are everything we expected them to be and then some. Tons of adjustability, works for stanard or GP shift and fully compatible with the OEM quick shift sensor this kit of rearsets will not disappoint.
The Attack Rearsets are the one of many rearset kits that have been installed on this bike now so we have an excellent baseline when comparing them to other brands. The quality is top shelf, perfect fit, tons of adjustability (the most) and the perform at the highest level. Grip from the footpegs was outstanding, the bearings on the shift and brake pedals were smooth and tight, super precise while riding which is important when you pick up the pace. If you are shopping for a high end pair of rearsets for your bike Attack should be on your short list, they are worth every penny and will not disappoint.
-
2015-2018 Yamaha R1 Vortex Fixed Superbike Rearsets Install
-
-
Vortex Racing Rearsets are the industry leader for sure. The Vortex Yamaha R1 2015-2018 Superbike Rearsets offer a fixed footpeg position that puts the rider in the perfect position while pushing the big Yamaha to the limit. The fixed design allows for a lighter weight set up that increases the overall strength and durability in the event of a crash which can make or break a weekend at the race track. Watch as Van goes into further detail on how to install the Superbike Rearsets from Vortex.
2015-2018 Yamaha R1 Vortex V3 2.0 Adjustable Rearsets Install
-
The 2015-2018 Yamaha R1 Vortex V3 2.0 Adjustable Rearsets use the all new Vortex Rearset Design we first saw late last year with their new ZX-10R kit. Their V3 2.0 design offers more adjustment for both the footpegs and the toe pieces than before. The R1 kits includes a bracket that allows for removal of the kick stand that allows for removal of the OEM kick stand bracket if you have a track bike (no need to worry you can keep the OEM kickstand on for street applications). You will also find an exhaust bracket included with this kit making it the most complete R1 kit on the market at this time.
Vortex designed the kit to work with both standard and GP shift patterns. To round it off this kit works with OEM or aftermarket quick shift (you simply install the same shift rods you were using previously).
-
2015-2018 Yamaha R1 Vortex V3 Chain and Sprocket Kit Install
-
-
Vortex offers complete 2015-2018 Yamaha R1 Chain and Sprocket Kits in several combinations that come precut ready to assemble. Vortex Racing Performance Parts are made to the tightest tolerances with the best quality materials available in this industry. Each of the Vortex Race Components has been tested on the track worldwide by top teams and professional racers (Josh Hayes, Martin Cardenas and Jordan Suzuki to name a few. In this video, Van will show you how to install a new chain, as well as front and rear sprockets. Watch as Van goes into more detail in this install of the V3 Chain Kit from Vortex.
2015-2018 Yamaha R1 Driven / RK Chain and Sprocket Kit Install
-
Driven and RK Chain have partnered up offering the 2015-2018 Yamaha R1 Quick Acceleration Chain Kit that comes precut and ready to install. This kit includes Driven Racing 520 Steel Sprockets for both the front and rear paired up with an RK premium, lightweight chain. This kit is geared for faster acceleration with a 15 tooth front sprocket (1 tooth down from the OEM 16 tooth) and a 41 tooth rear.
-
2015-2018 Yamaha R1 Lightech Chain Adjusters Install
-
-
Installing 2015-2018 Yamaha R1 Lightech Chain Adjuster on your bike makes adjusting the chain slack evenly a breeze. The design and build quality of these are absolutely amazing. Once you have installed these on a bike you will install them on every bike you own. There are fewer and fewer products today manufactured at the level of lightech accessories and this chain adjuster is a prime example of their commitment to quality.
How To Clean The Chain on a 2015-2018 Yamaha R1
-
Maintaining your chain and sprockets is key to smooth, trouble free riding for sure. Keeping your chain clean, lubed and properly adjusted will extend their life, add power (dirty, misaligned drive line parts rob power) and make the bike look better. We have a full video tutorial featuring the STG R1 where Van shows you how to dial in the chain and sprockets on your R1 using Maxima products.
-
2015-2018 Yamaha R1 Driven Endurance Cups Install
-
-
Driven Racing products are designed to be both effective performance upgrades and aesthetic improvements on any motorcycle as they are available in a variety of colors to match any color scheme. Driven Racing Endurance Cups for the 2015-2018 Yamaha R1 are a great example of a product that not only looks good but functions well in performance applications as well. Used for quick tire changes in the professional racing world these endurance cups also add a pop of color to any street or track bike. Machined from billet aluminium these endurance cups are also effective in protecting the axel nut from damage in the event of a crash.
2015-2018 Yamaha R1 Driven Axle Block Sliders Install
-
Driven Racing products are designed to be both effective performance upgrades and aesthetic improvements on any motorcycle as they are available in a variety of colors to match any color scheme. Driven Axle Block Sliders for the 2015-2018 Yamaha R1 are specifically effective in both the styling and protection categories with capabilities of protecting integral components in the rear suspension system. The replaceable sliders make this product an effective alternative to plain rear axel sliders while utilizing light and strong billet aluminum materials.
-
2015-2018 Yamaha R1 Yoshimura Axle Block Adjusters Install
-
-
Anyone who has tried to adjust their chain with OEM style axle adjuster blocks knows the frustration of dealing with sub-par quality. These Yoshimura units are lighter weight, more accurate, stronger than the factory blocks, and look great too! Yoshimura Axle Block Adjusters for the 2015-2018 Yamaha R1 give you more control over axle placement and wheel base on your R1.
2015-2018 Yamaha R1 Attack Sprocket Guard & Lifter Kit Install
-
The Attack 2015-2018 Yamaha R1 Sprocket Guard and Lifter Kit is another solid example of just how good Attack Performance Parts are. For the R1 Attach designed a superbike lifter kit (requires a GP Style Stand from Pit Bull or something comparable) with an integrated sprocket toe guard on the drive side. They bolt up easy, look amazing and worked great with the Pit Bull Stand.
-
2015-2018 Yamaha R1 Woodcraft Superbike Lifters Install
-
-
Woodcraft introduced their new line of motorcycle stands in the fall of 2017 along with superbike lifters for most common sport bikes. The Woodcraft Superbike Lifters for the 2015-2018 Yamaha R1 are easy to install and work perfectly when paired with their Woodcraft Adjustable Rear Superbike Stand.
2015-2018 Yamaha R1 Graves Fender Eliminator Install
-
-
The stock rear fender on the new R1 is the first thing that needed to go. Van installed a Graves 2015-2018 Yamaha R1 Fender Eliminator in it's place. Graves does a great job across the board but when it comes to their Yamaha Parts they knock it out of the park. The fender eliminator is a perfect example of just that. Our install reused the stock LED rear turn signals and delivered a clean, race ready look as expected.
This fender eliminator kit took a little more engineering than most do to produce a finished product worthy of being installed on the R1. The kit includes a full set of instructions with pictures to help with the install and ensure you get a good clean result. Graves covered all the bases with this one and I would recommend it for sure.
2015-2018 Yamaha R1 Yoshimura Fender Eliminator Install
-
One of the first upgrades many individuals decide to make on their bike is the elimination of the large an unsightly rear fender. The Yoshimura 2015-2018 Yamaha R1 Fender Eliminator really cleans the rear of the R1 up when it's installed, giving it the look it deserves. This stock fender generally is responsible for holding the license plate and the turn signals from the factory and is placed in accordance with the laws that manufactures must follow in order to build a compliant product. This, unfortunately, means that you cannot simply remove the stock fender as it holds many essential components that make the bike legal. In this video Van swaps out the original fender on a 2015 R1 for a Yoshimura fender eliminator kit.
-
2015-2018 Yamaha R1 Hotbodies Fender Eliminator Install
-
-
Hotbodies Racing created another winning Tag Bracket fender eliminator kit, this time for the popular Yamaha YZF-R1! Hotbodies 2015-2018 Yamaha R1 Fender Eliminator will enhance your new bike even more by taking the tow hitch off your ride. This kit is a must have for anyone wanting to add that little extra touch to their bike, and best of all its affordable for any budget. This Tag Bracket fender eliminator kit is specifically designed to replace your stock mud flap using your original mounting position and features a LED license plate light to keep your plate visible. Watch as Van installs this super clean and functional accessory on the all new 2015 Yamaha YZF-R1.
How To Remove Stock Bodywork on a 2015-2018 Yamaha R1
-
In order to install race bodywork or access critical components of a sport bike it is often the most effective to remove bodywork entirely to avoid damage. This is a relatively simple process once it has been completed but it is also in many ways very delicate as it is important to not damage any of the items while removing them from the motorcycle. Bodywork can be expensive so it is crucial that when removing bodywork the time is taken to fully understand how all components of the motorcycle secure to the bodywork and also what to pay attention to what is the best order in which we should remove items from the bike. In this video Brian will demonstrate on the 2015 Yamaha R1 project bike the most effective way to remove the body panels so that he may install Hotbodies Race Bodywork.
-
2015-2018 Yamaha R1 Armour Bodies Race Bodywork Install
-
-
The Armour Bodies 2015-2018 Yamaha R1 Race Bodywork Kit gets you that high end fit and finish at an affordable price. This stuff is so close to Sharkskinz (sometimes the fit is even better) that you can't justify spending $400 - $500 more. Armour Bodies Race Bodywork is truly a high end product that has a reasonable retail price.
2015-2018 Yamaha R1 Hotbodies Color Form Race Bodywork Install
-
Hotbodies 2015-2018 Yamaha R1 Colorform Race Bodywork Kit has the color mixed in the resin used to make the bodywork. This is a good option if you would perfer not to invest in a paint job (typically around $600). Hotbodies kits are the most affordable and best selling kits we offer. The fit and finish are both good but not perfect (remember this is race bodywork not OEM street stuff). After installing the colorform bodywork we suggest polishing it with rubbing compound and painting the inside black. Investing a little extra time to do this gets you a pretty solid end result.
-
2015-2018 Yamaha R1 Hotbodies Race Bodywork Install
-
-
This is one of our best selling bodywork kits! The Hotbodies 2015-2018 Yamaha R1 Race Bodywork Kit fits well and is not very difficult to install on this model. This is the only kit we installed and had painted on our STG R1. It was on the bike for the entire length of the project so we are very familiar with this kit. We feel this is an excellent option for the R1.
2015-2018 Yamaha R1 Motoholders Upper Fairing Stay Install
-
If you have installed or plan to install race bodywork on your R1 we strongly recommend installing this fairing stay. The Motoholders 2015-2018 Yamaha R1 Fairing Stay w/Carbon Duct replaces the OEM intake duct (rubber and plastic) with a beautiful carbon fiber one. This really cleans un the front of the bike and integrates nicely with the race bodywork ram air inlet. The OEM rubber boot that this replaces is pretty flimsy and tends to block air flow.
-
2015-2018 Yamaha R1 Techspec Tank Pad Install
-
-
Tank grip pads are a must if you ride hard. The grip they add allows you to put less pressure on your hands, allowing you to use your lower body more. The Techspec 2015-2018 Yamaha R1 Tank Grip is available in Snakeskin (what we installed in this video) or their new X-Line material. This is an easy install as well as a mod most riders really need.
2015-2018 Yamaha R1 Driven Mirror Eliminators Install
-
Driven Mirror Eliminators for the Yamaha 2015-2018 Yamaha R1 install flus and really streamline the look up front. These aren't your average mirror eliminators. These are aircraft grade aluminum which will not only do the job eliminating your mirrors but do it with a clean finished look. *Turn signal wire hole plug included. These block off are a great product for any street rider looking to head to the race track. Simply remove your mirrors and replace them with the block off plates and your bike will have that streamline look and allow your mirrors to be sparred in the event of a crash at the track. Easy to install while also adding a huge aesthetic bump these block offs are an inexpensive way to increase curb appeal and save your mirrors from damage at the track.
-
2015-2018 Yamaha R1 Hotbodies Windscreen Install
-
-
The Hotbodies 2015-2018 Yamaha R1 Windscreen is available in clear or smoke tints with OEM or Dual Radius shape. Hotbodies makes their screens in the US at their shop in CA and come in at a nice price point.
2015-2018 Yamaha R1 Driven Halo Gas Cap Install
-
The Driven 2015-2018 Yamaha R1 Halo Fuel Cap is without question one of the coolest bolt on parts available. Made from aerospace grade aluminum and then anodized in an assorted variety of colors. This item is available to fit most late model sportbike applications. The cap and base are made in the USA and in this video you will see Van install the base and cap on a new Yamaha R1. This impressive product vents well, functions well and looks great so be sure to consider the Driven Halo cap and base when thinking about your next on or off track motorcycle upgrade.
-
2015-2018 Yamaha R1 Woodcraft Frame Sliders Install
-
-
The Woodcraft 2015-2018 Yamaha R1 Frame Sliders showcase an all new frame slider puck developed to perform on the track or the street. Woodcraft frame sliders offer a two piece design that makes replacing the puck a snap if you ever have the need to do so.
Frame sliders should in reality be the very first modification you make to any race or street bike. The amount of damage and hassle a good set of frame sliders can prevent is well worth the money and little effort it requires to install a great equipment protection measure. Woodcraft's patented 2-piece sliders are the most durable sliders on the market. The perpendicular mounting bolt allows the slider to be solid rather than hollow (like other sliders) which provides nearly 50% more material on the road and much greater durability.
2015-2018 Yamaha R1 LSL Frame Sliders Install
-
Low profile, aerodynamic and light weight make the LSL 2015-2018 Yamaha R1 Frame Sliders one of the most popular kits we offer for this bike. The LSL kit installs easily and do not take away from the classic R1 style like other slider designs tend to do.
-
2015-2018 Yamaha R1 Lightech Frame Sliders Install
-
-
Lightech 2015-2018 Yamaha R1 Frame Sliders feature a multi layer slider puck to help manage energy in a crash or tip over that sets them apart from the competition. Installation require basic hand tools and should take less than an hour. Quality is top notch just like the other Lightech parts we installed on the STG R1 Project Bike.
2015-2018 Yamaha R1 GB Racing Frame Sliders Install
-
The GB Racing 2015-2018 Yamaha R1 Frame Sliders are designed to eliminate damage related to "flipping" in the event of a motorcycle crash. The sliders mount flush with the body work of many different motorcycles and function effectively to save many different components of the motorcycle while also keeping the bike sliding as opposed to the more damaging results of the motorcycle tumbling. The installation was not difficult with the help of the instructions however if you do not feel comfortable completing this modification please seek the assistance of a trained professional for installation.
-
2015-2018 Yamaha R1 Lightech Axle Sliders Install
-
-
The Lightech 2015-2018 Yamaha R1 Axle Sliders LighTech Axle Sliders are made of high impact Nylon with an Aluminum insert. This design greatly reduces the chance of damaging your forks in the event of a crash by dispersing impact and energy. Lightech again develops a product that is both innovative and stylish, matching the R1 project bike perfectly. In addition to the quality the installation is simple and painless, so watch as Van installs these great new slider products to protect this years Project bike.
How To Change Your Coolant On a 2015-2018 Yamaha R1
-
-
There are a couple of different reasons someone may need to change the coolant on their motorcycle whether it be routine maintenance or compliance at the track. In this video Van will show viewers how he changes coolant on the new 2015-2018 Yamaha R1 Project bike. Watch as Van takes the necessary steps to complete this process the correct way to ensure that the crucial cooling system continues to function effectively while also adding a track friendly solvent to the motorcycle.
2015-2018 Yamaha R1 Samco Hose Kit Install
-
Installing Samco Hoses on your 2015-2018 Yamaha R1 will give your bike the WSBK look with some added performance benefits. SamcoSport has been the world leader in Performance Silicone hose for over 10 years, supplying Formula One, NASCAR, and World Super Bike teams and our range of replacement hose kits, race parts and accessories is second to none. Watch as Brian installs these quality cooling hoses on the Yamaha YZF-R1.
-
2015-2018 Yamaha R1 Cox Radiator Guard Install
-
-
The last thing anyone wants is to experience a mechanical failure that could easily have been prevented. Installing the Cox 2015-2018 Yamaha R1 Radiator and Oil Cooler Guard is a must have mod for both street and track riders. Installng the guard protects that giant radiator that keeps your R1 cool from being punctured by debri. One little hole is all it takes to keep you sitting in the pits or on the side of the road.
2015-2018 Yamaha R1 Graves Block Off Plate Install
-
If you plan to install a full exhaust system on your bike you should install a set of block off plates at the same time. Graves 2015-2018 Yamaha R1 Smog Block Off Plates will be needed to help get the air fuel ratio accurate on your closed course machine. To get an accurate Air:Fuel (A/F) ratio when dynoing the bike. The air injection system pumps fresh air directly into the exhaust stream in order to burn off any unused fuel. Unfortunately by doing this the A/F ratio is thrown off by the extra "fresh air" in the exhaust stream. By removing the air injection system you can achieve an accurate A/F ratio.
-
2015-2018 Yamaha R1 GB Racing Engine Cover Guards Install
-
-
The stock engine covers can be damaged in a tip over or a race track crash. Installing the GB Racing 2015-2018 Yamaha R1 Engine Cover Guards can help prevent this whether you are a street or track rider. This is another excellent mod we feel most R1 owners should consider. The GB Racing Engine Cover Kit installs easily right over your stock Yamaha covers.
2015-2018 Yamaha R1 Yoshimura Case Savers Install
-
Yoshiumuira makes a wide variety of performance parts for many different motorcycles. In this Video Van breaks down the installation and features of the Yoshimura Engine Case Saver for the 2015-2018 Yamaha R1. These case savers are available for many different motorcycles aside from the R1 so if you like the look it is likely that the site will have these case savers for your bike. There are several different levels of protection when it comes to these savers and if you are looking for a product that looks great and is functional in minor lowsides or drop then this is without a doubt a product that would work well for you.
-
2015-2018 Yamaha R1 Driven Engine Plug Install
-
-
The Driven Racing Engine Plug is a functional mod that improves the look of the bike at the same time. Installing the Driven 2015-2018 Yamaha R1 Engine Plug is easy to do and allows for safety wire to be installed using the predrilled hole (the functional part) to make sure the plug stays in place. Driven engine plugs are available in multiple colors to accent your bike.
2015-2018 Yamaha R1 Spiegler Brake Line Kit Install
-
One of my go to and necessary upgrades for every motorcycle is to install stainless steel brake lines and we went with Spiegler Performance again for the R1. I started off with removing the ABS, but after a great deal of research we decided it would be best to leave it for the time being as it works in conjunction with the traction control and some of the other electronics. Throughout the video I reference taking it out, but please ignore all of those comments as I decided to leave it for the time being.
The remainder of the install of the Spiegler Performance Brake Lines is the same for the front and rear on the Yamaha YZF-R1. This installation is a little more involved than some of the other bikes we've done with all the new technology and new components built into this bike.
-
2015-2018 Yamaha R1 FlashTune ABS Delete Install
-
-
One of the first projects we tackled was to remove the ABS and install the Spiegler Brake Lines. When I did this I had hoped to remove the ABS pump and module but was unable to do so at that time. Finally in the fall of 2017 FTECU released the FlashTune ABS Delete Plug Plus Yamaha R1 2015-2018. This was a very simple install that allows for the removal of the OEM ABS unit (save about 3lbs) wihtout interferring with the stock electronic aids on the R1.
I was able to ride with this installed at Barber one last time and it performed as advertised. If you want to eliminate the ABS on your R1 this is a must have part.
2015-2018 Yamaha R1 Ohlins Rear Shock Install
-
-
After doing my first track day on the 2015 Yamaha YZF-R1, it is time to upgrade the suspension to Ohlins. The one we are installing is the 2015-2018 Yamaha R1 Ohlins TTX GP Shock, which has a mechanical pre-load adjustment, as well as the compression and rebound. We can complete the install with simple hand tools and start with removing the rear wheel and taking out the stock rear shock. While you have everything disassembled, I always like to lubricate the bearings because sometimes there isn't enough on there even from the factory. I have a pair of Pit Bull Jack Stands, which makes suspension work much easier, but you can get creative depending on the space or availability of items in your garage.
It is very important to take your time installing the new Ohlins rear shock and use the proper lubricant and torque specifications during this process. You do not want this coming loose and if you don't feel comfortable completing the project yourself, always utilize a licensed mechanic.
How To Remove and Install a Rear Tire on a 2015-2018 Yamaha R1
-
Being able to perform you own routine maintenance is crucial, especially when going to the race track. Task like changing a tire can be easy for some individuals yet difficult for other based on the various bikes on the market and the tools available. In this video Brian shows viewers his process for changing the rear tire on a 2015 Yamaha R1 and how simple it can be once you have performed this task. The 2015 Yamaha R1 has a basic sliding rear adjuster that is simple yet complex, so watch closely as Can makes quick work of this job.
-
2015-2018 Yamaha R1 Ohlins Rear Shock Install
-
-
For aggressive street and track riders a steering damper is an invaluable component that helps keep a rider comfortable at high speeds and in high performance turning situations. Although this item is necessary the OEM equipment is often lacking in the ability to do a sufficient job preventing head shake and tank slappers. For this reason many individuals find it beneficial to replace the OEM steering damper with an item from one of the leading suspension manufacturers like Ohlins. The Ohlins Steering Damper for the 2015-2018 Yamaha R1 will improve the already staggering performance of this R1 and give van the comfort and stability he needs when taking this motorcycle to the race track.
2015-2018 Yamaha R1 Driven Captive Wheel Spacers Install
-
If you ride your motorcycle on the race track the Driven Captive Wheel Spacers for the 2015-2018 Yamaha R1 are a nice upgrade. When the wheel spacers are held in place it makes tire changes a breeze. Held in place by the dust seal these captive wheel spacers will allow you to remove the tire without ever misplacing you wheel spacers. These anodized wheel spacers are strong rust preventative objects that any racer or trackday enthusiast will benefit greatly from. The installation of these spacers is quick and easy and the benefits will last the lifetime of your wheel allowing riders more time on the track and less time in the pits which is great news for anyone who loves tearing up the pavement from session to session.
-
2015-2018 Yamaha R1 Driven Halo Clip On Install
-
-
Driven Halo Clip Ons include alignment marks on the cuffs as well as the handlebar tubes to ensure dailed in ergonomics. Each product is engineered with the highest level of performance in mind and in the case of these clip-ons are composed of machined aluminium to make a strong and lightweight product fixed at a 7 degree and to accommodate the most effective body position while providing comfort to reduce distraction. Additionally the bars are available for individual purchase making it even easier to repair a motorcycle in the event of a crash.
2015-2018 Yamaha R1 Lightech Lever Set Install
-
LighTech Magnesium Folding Brake and Clutch Levers are used extensively by World Superbike, AMA, British Superbike, Moto2 and MotoGP teams. Constructed of high quality magnesium making them lighter than standard aluminum, saving the rider precious ounces! Their straight folding lever design reduces damage in the event of a crash. Installing the Lightech 2015-2018 Lever Kit is a simple straight forward mod most riders can do.
-
2015-2018 Yamaha R1 Lightech Brake Lever Guard Install
-
-
Lightech Lever Guards are a universal part that require a model specific mount if they are going to be installed on the OEM clip ons or the Lightech Universal Mount if they will be installed on a set of aftermarket clip ons (this is the most common install). As with the other Lightech items we have installed on the STG Yamaha R1 Project Bike the fit and quality is top notch. These are available in several different colors to match your bike.
2015-2018 Yamaha R1 Flash Tune ECU Flash
-
-
ECU Flash Tuning is becoming more and more popular everyday now. This was my first experience with it and it was a good one, easy to do, worked great and zero issues. The FlashTune 2015-2018 Yamaha R1 Bench Tuner Kit is the most popular fuel control upgrade we offer. Graves has partnered FTECU so their Yamaha stuff is very good making this the right choice for most R1 owners.
2015-2018 Yamaha R1 FlashTune Auto Blip Clutchless Downshift Kit Install
-
I installed this when it was first released and feel it is the best mod ever! With the FlashTune 2015-2016 Yamaha R1 Auto Blip Kit every upshit and downshift is executed flawlessly without ever touching the clutch. It is important to note that you must use the FlashTune ECU Flash with this in order to enable the function.
-
2015-2018 Yamaha R1 SkutrNet Exhaust Servo Buddy Install
-
-
When you install an exhaust system on a sportbike that is equipped with an exhaust valve from the factory odds are you will be removing that valve and servo motor. The servo is part of the emission control system so a check engine light will be illuminated when you do this. The SkutrNet 2015-2018 Yamaha R1 Exhaust Servo Buddy plugs into the OEM servo motor connector and removes the ecu fault turning the check engine light off.
2015-2018 Yamaha R1 Woodcraft Keyswitch Elimination Harness Install
-
Woodcraft 2015-2018 Yamaha R1 Keyswitch Elimination Harness lets you remove your stock ignition switch saving weight where it counts - up high! Removing your stock ignition will also free up valuable space for steering dampers and lap timers. The things you need go in the space you save. There is no longer a need for keys. The best thing about our Key Switch Eliminator is the ability to simply "Plug and Play". It installs in seconds and requires no modifications to your stock harness - no need to cut any wires! This means easy re - installation of stock components down the road.
-
2015-2018 Yamaha R1 Ballistic EVO Power System Install
-
-
Installing a light weight lithium battery is an affordable way to shave some serious weight off your R1. The Ballistic 2015-2018 Yamaha R1 Ballistic EVO Power System comes with everything you need to swap out that heavy OEM lead acid battery and maintain your new lithium battery. The kit includes a battery, charger and health monitor that doubles as a quick connect port. Many of the new bikes today have heavy power draws when they are not being ridden so the best practice is to keep them on a maintainence charger. This kit makes that very easy to do and the quality is excellent.

